Friday 29 April 2022

Strasbourg vs. PSG: Ligue 1 stream details,how to watch online, news, odds, time and tv channel

Strasbourg and PSG will face off in a Ligue 1 matchup on Saturday. This will be the first meeting between the two clubs this season.


PSG is currently in first place in the Ligue 1 standings with 60 points, while Strasbourg is in ninth place with 36 points. PSG has won 18 of its 27 league games this season, while Strasbourg has won 10 of 27.

In their last meeting, which took place in February 2018, PSG defeated Strasbourg 2-0.

PSG is a heavy favorite to win Saturday's match, but Strasbourg will be looking to pull off an upset. Tune in to see if the home team can get the job done.
Ligue 1 live stream info, channel: How to watch Strasbourg vs. PSG on TV, stream online
Strasbourg faces PSG in Ligue 1 play on Saturday, March 16. Here's all the info you need to watch a free live stream of the match.
When: Saturday, March 16 at 10 a.m. ET
TV: beIN Sports (English broadcast)
Online streaming: fuboTV (free trial), Sling TV (free trial)

Strasbourg vs. PSG match preview

Strasbourg will look to continue its push for a top-five finish when it hosts PSG on Saturday. The club is currently in ninth place with 36 points, but it is just four points behind fifth-place Marseille. Strasbourg has won 10 of its 27 league games this season, and it comes into this match off of a 1-0 victory over Bordeaux last weekend. PSG, meanwhile, is in first place with 60.
how to watch online Strasbourg vs. PSG live stream free
The match is on beIN Sports. You can watch the match as a streaming version of this channel through fuboTV (free trial). For more information and options, check out our detailed guide here.
Strasbourg vs PSG team news
PSG will have to do without Neymar (ankle) while Thomas Meunier and Gianluigi Buffon are both one yellow card away from missing next weekend's clash with the league leaders . Strasbourg has no notable absentees for their home game against PSG . Match facts Three of PSG 's last four competitive fixtures against Strasbourg have produced exactly four goals in total . The French club has won nine of its last 10 Ligue 1 contests played


Strasbourg vs. PSG news


Strasbourg, which is currently in ninth place in Ligue 1 with 36 points, will be looking to put together a run of positive results and potentially make a push for a top-five finish. That task won't be easy as the club faces PSG on Saturday. PSG has 60 points at the moment and sits atop the table, although it has played one more match than second-place Lille. This could be a high-scoring affair given that three of Strasbourg's last four competitive matches versus PSG have ended with exactly four goals scored in total. For those interested in streaming this contest via beIN Sports (English broadcast), fuboTV (free trial) or Sling TV (free trial) will.

ods: Strasbourg vs. PSG


Saturday, March 16 at 10:00am ET


Strasbourg and PSG will face off in a Ligue 1 matchup on Saturday. This will be the first meeting between the two clubs this season.


PSG is currently in first place in the Ligue 1 standings with 60 points, while Strasbourg is in ninth place with 36 points. PSG has won 18 of its 27 league games this season, while Strasbourg has won 10 of 27.

In their last meeting, which took place in February 2018, PSG defeated Strasbourg 2-0.

PSG is a heavy favorite to win Saturday's match, but Strasbourg will be looking to pull off

Strasbourg vs. PSG timing

The match is on beIN Sports. You can watch the match as a streaming version of this channel through fuboTV (free trial). For more information and options, check out our detailed guide here.

Strasbourg vs PSG team news

PSG will have to do without Neymar (ankle) while Thomas Meunier and Gianluigi Buffon are both one yellow card away from missing next weekend's clash with the league leaders . Strasbourg has no notable absentees for their home game against PSG . Match facts Three of PSG 's last four competitive fixtures against Strasbourg have produced exactly four goals in total .

Monday 21 September 2015

How to install ClipBucket via Softaculous (Auto installation of clipbucket)

Installing the ClipBucket application on your website via the Softaculous autoinstaller


The Clip Bucket application is fully supported by the Softaculous autoinstaller which means that with few clicks you will be able to install it on your hosting package with us. In this tutorial we will review the whole installation process of the Clip Bucket application via the Softaculous autoinstaller.

Step 1 Accessing the installation page


In order to begin with the installation you will need to login into your cPanel service and locate the Softaculous icon.

accessing-softaculous

Then you will need to find the Clip Bucket application either by searching for the same in the “Search” feature locate in the upper right corner of your screen or to locate the application in the “Video” category included in the left vertical category list.

searching-for-clip-bucket

Once you find it you will need to click on the name of the application and you will be redirected to the “Overview” page for the script where you will be presented with basic information for the script and the supported version.

searching-for-clip-bucket

Then you can proceed with the installation by clicking on the “Install” tab right next to the “Overview” tab you are currently at.

Step 2 Configuring the installation


Before the Softaculous autoinstaller can install the application for you there are few settings you will need to configure and all of those will be presented in the tab you have just clicked on – “Install”.

The settings are conveniently separated on few sections which we will present you with in the next lines of this tutorial.

First you will notice the “Software Setup” section. The options you will need to configure there are:

  • Choose Protocol – The prefix of the URL you will be accessing your Clip Bucket installation.
  • Choose Domain  - The domain where your Clip Bucket application should be installed. Usually in this drop-down list you will find all of the domains associated with your hosting package with us. These can be subdomains or addon domains.
  • Database name - The name of the database which the script will be using. Note that you can completely leave this field as it is due to the fact that the Softaculous autoinstaller will created the database and the user for you.
  • Cron job - The cron Job of the application. Please leave it as it is.

software-setup-configuration

The next section is called “Site Settings” and there you will find the simple settings for your website such as:

  • Site name – The name of your website
  • Site Description – The description of your website

settings-configuration

The next section will be the “Database Settings” section where you will need to configure only the prefix of your database.

The final section is called “Admin Account” and there you will be able to configure the information for the admin account which will be created automatically with the setup.

admin-account-settings

Now, before you can proceed with the installation there is one additional section which is displayed but is closed. This section is called “Advanced options” and there you will be able to configure the backups for the application which will be automatically performed by the Softaculous application.

Finally when you are ready with all of these settings please press the “Install” button located at the bottom of the page so the installation process can begin.

advanced-options-and-installation

After few seconds you will have fully functional Clip Bucket installation and you will be presented with the access details for the same on the next page and on your email address.

installation-finished

Congratulations! You have successfully installed the Clip Bucket application via the Softaculous autoinstaller!

How to install ClipBucket manually 2015-16

Installing the ClipBucket application on your website manually


In order to use the Clip Bucket application you will need to install it on your website. The installation process is fairly simple and in this tutorial we are going to show you how to complete the manual installation process using the provided installer from Clip Bucket.

Step 1Preparing the files and the requirements for the installation 


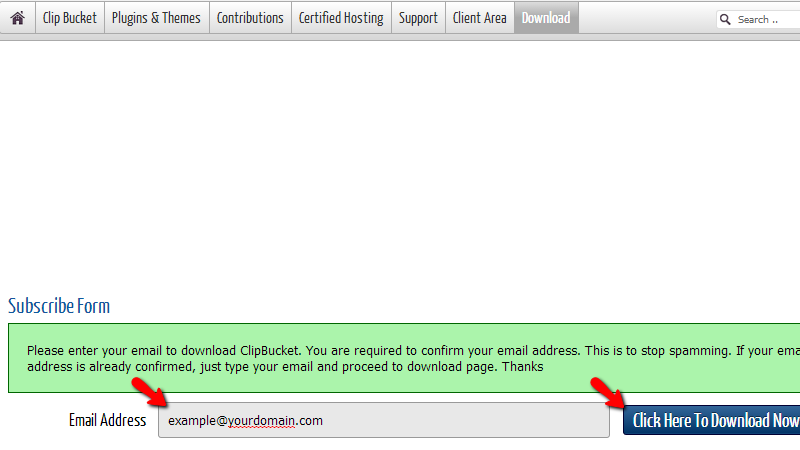
Before you can install the application you will need to prepare the installation files. You can download these files at the official download page of the Clip Bucket application.

There you will need to subscribe by filling your email address and by clicking on the “Click Here To Download Now” the Clip Bucket team will send you a confirmation email.

downloading-clip-bucket

The content of the email you will receive will be similar to the following:

downloading-clip-bucket

Please click on the provided link there and you will be redirected to the download page for the application where you will need to simply click on the “Download” button:

downloading-clip-bucket

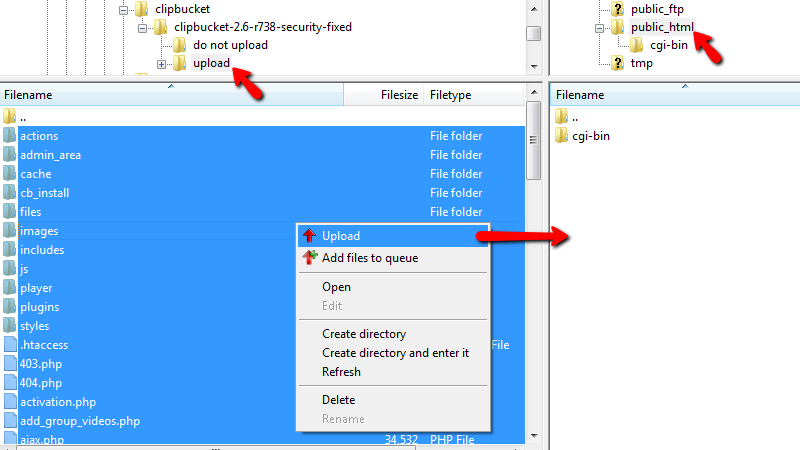
Once you download the archive with the installation files you will need to extract the archive on your local computer.

extracting-clip-bucket

The folder you will receive contains 2 inner folders – “do not upload” and “upload”. Respectively you will need only the “upload” folder as there you will find the installation files.

In order to upload the installation files to your website you will need to connect to the FTP service for your package with us. If you are not sure that you are able to use the FTP service please check our FTP tutorial series.

Once you are connected to the FTP service for your package you will need to access the folder of your hosting space with us where the application should be installed in.

uploading-clip-bucket

The last preparation you should handle is to create a database and user associated with the database. This can be easily achieved via your cPanel > MySQL Database Wizard.

Step 2Initiating the installation script and performing the installation procedure 


Once you have uploaded the files for example in the “public_html” folder of your account you will need to initiate the installation script. This can be easily achieved if you simply access yourdomainame.com or yourdomainname.com/subfoldername if you are about to perform the installation of the application in a subfolder.

starting-the-installation

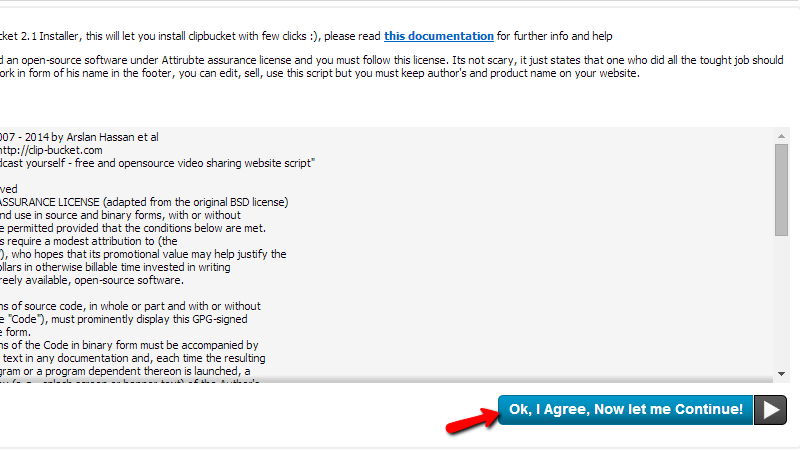
The first screen from the installation process is related to the license agreement. Please read it carefully and press the “Ok, I Agree, Now let me Continue!” button of course if you are agree with the license agreement.

On the next screen the installation script will check the main requirements of the script. Now, even if some of them are marked in red you should simply press the “Continue To Next Step” button and after the installation you will be able to configure the correct paths to the services.

The next screen will present you from the result of the file/folders permissions check. If you have followed the upload instructions in Step 1 of this tutorial all of the permissions should be properly configured and all of them should be marked in green. Please click on “Continue To Next Step” button so you can be able to proceed with the installation.

checking-directory-permissions

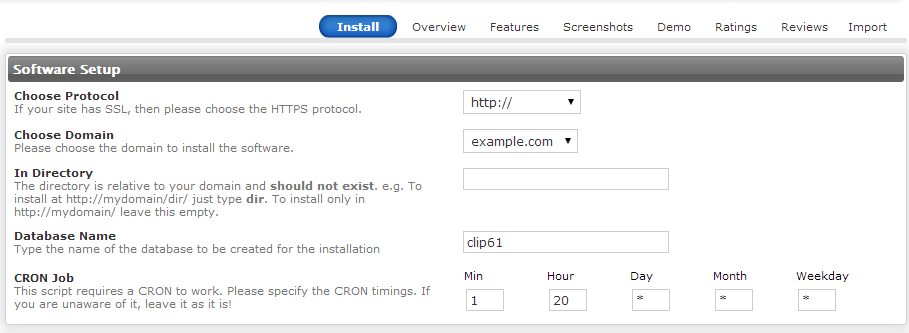
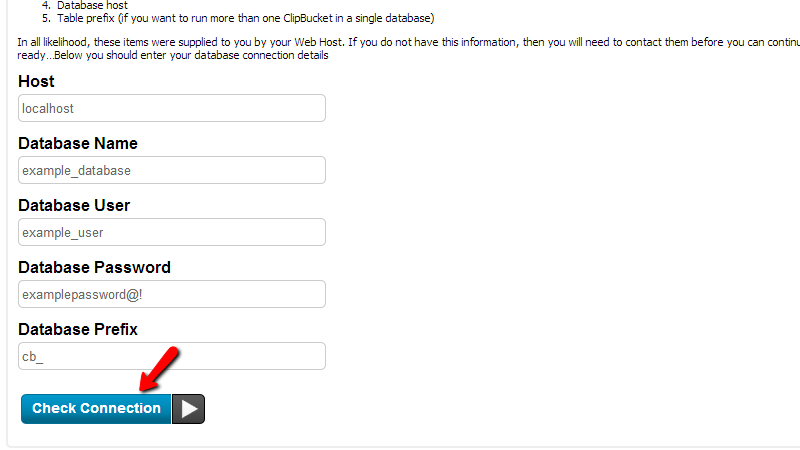
On the next page you will need to configure the database your application will be using. Note that you should have already created the database and the username to operate with it in the end of Step 1.

The values you will need to fill on this page are:

  • Host  - it should be automatically filled with the “localhost” string and you should leave it that way.
  • Database Name – the name of your database. Note that the database name contain also the username of your account with is as prefix – example_database, where example is the username of your account and database is the database name you have set when you were creating the database.
  • Database User – The username of user assigned to the created database – example_username, where example is the username of your account with us and username is the actual username you have set when you were creating the user.
  • Database Password – The password for the database user you have created.
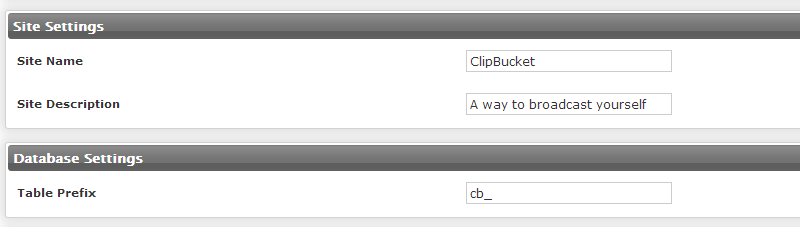
  • Database Prefix – Usually this field should be predefined as “cb_” and you should probably leave it that way or change it if you would like the tables in the database of your website to be with that prefix.

configuring-mysql-database

On the next page you will notice that the installation script will deploy the tables in the database and also modify the required files. 
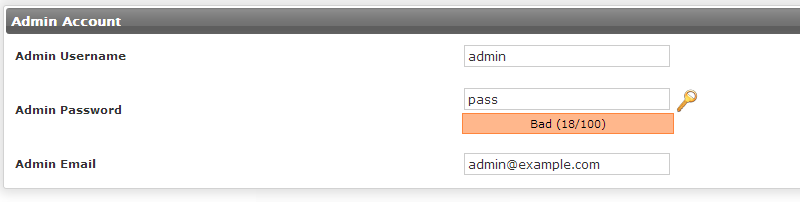
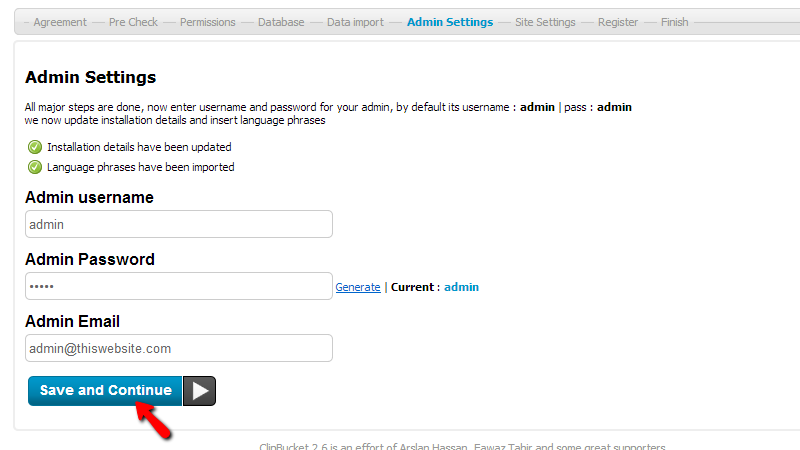
Once the process is finished you will be presented with the Admin Settings page where you will need to configure the “Admin username”, “Admin Password” and of course the “Admin Email”. Once you are ready please click on the “Save and Continue” button so you can proceed.

admin-account-settings

On the next page you will need to configure the “Website basic configuration”. There you will find the following fields:

  • Website Title – The title of your website
  • Website Slogan – The slogan of your website
  • Website URL – The URL to the location where you can access the Clip Bucket application.

website-basic-configuration

Once you are ready please click on the “Save and Continue” button so you can proceed with the setup.

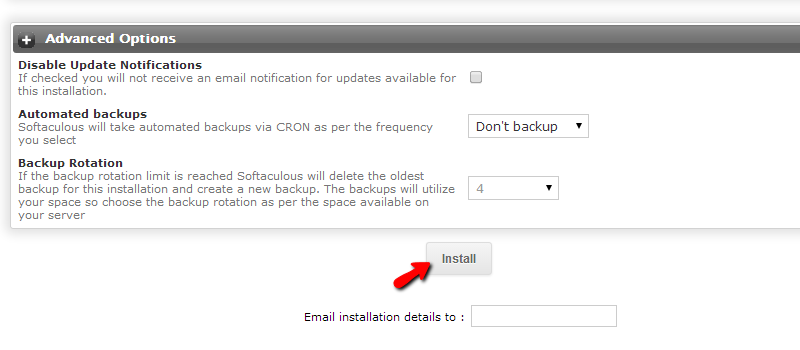
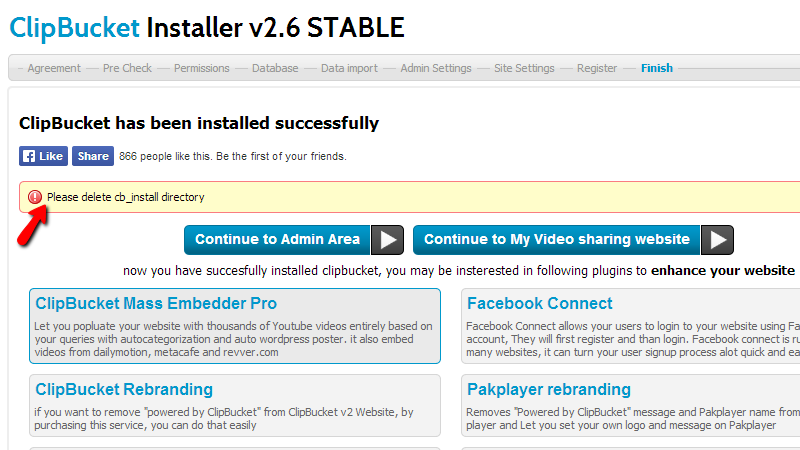
On the next page you will be presented with the option to register your installation and you should do so by clicking the “Register and Finish” button.

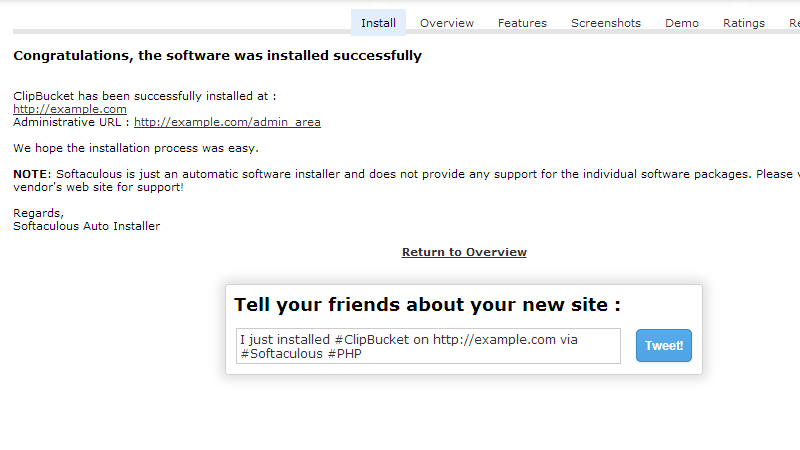
Next you will be redirected to the final page of the installation process where you will be instructed to delete the “cb_install” folder.

registering-your-software

The directory can be deleted either via the FTP service you have uploaded the files with or you can also delete it via the File Manager feature of the cPanel service.

Congratulations! You have successfully installed the Clip Bucket application manually on your hosting account with us!

Wednesday 4 February 2015

Clip Bucket V2.7 RC-3 Demo

 Clip Bucket V2.7 RC-3

Searches related to clipbucket

clipbucket v3
clipbucket requirements
clipbucket demo
clipbucket hosting
clipbucket themes
vidiscript
how to install clipbucket
clipbucket forum

How can we upgrade from 2.6 to stable 2.7 rc3

How can we upgrade from 2.6 to stable 2.7 rc3

Help & Support
Anyone know if and how an upgrade exist now that the the stable version of 2.7 is out. My 2.6 clipbucket site has over 15000 videos on it so I don't want to screw it up. www.mitube.pro10
Thanks
  • created

    Jan 27
  • last post

    Jan 27
  • 3

    posts

  • 66

    views

  • 2

    users

  • 1

    links

  • 2
Don't try clipbucket 2.7 rc3 for live website. because to many bugs on this version..
If you want to upgrade from cb version 2.6 to 2.7 is simply.
1. It is recommended to first backup your database
2. Upload the contents of the /upload folder on clipbucket 2.7 rc3 folder to public_html and overwrite existing files
3. Remove /files/install.loc file from your site directory (if any)
4. Point your browser to to /cb_install folder (http://yourdomain.com/cb_install/)
5. Click on the option labeled “Upgrade”
6. Follow the instructions
Good luck
Hey Tamtam
Thanks I tried uploading my site on another test site and tried the upgrade but I ended with a black screen (maybe because i have a specialized template, ice purple. I guess I'll have to wiat till they iron out the bugs.
Thanks anyway though !

ClipBucket 2.7.0.4 RC 3

ClipBucket 2.7.0.4 RC 3.

Categories: ClipBucket v2 , News
  • Thank you for choosing Clipbucket, the most comprehensive software package available for video sharing websites. We are pleased to announce that ClipBucket 2.7.0.4 RC 3 has been released.

  • clipbucketbanner
    Features introduced in this release
     

  • New Web 2.0 Bootstrap Responive Layout Design for both User and Admin
    New Mp4 Video conversion system
    Fully integrated Smarty version 3
    New CB html5 player with all required features


  • Existing Feratures
  •  
  • Easy to Moderate Videos, Users , Groups etc.
    Create Different User Groups to assign different permissions
    Improved SEO Friendly URLs
    Extendible with Plugins and Addons like WordPress
    Easy to install Themes and templates
    Daily Stats with graphical interface
    Mass Uploader via FTP
    Improved Channel System
    User Categories
    Advance reporting/flagging system
    Ajax Based favorite,comments,ratings and reporting
    Playlists
    Quicklists
    Search Engine
    Highly customizable Profile page
    A Complete SOCIAL NETWORK
    New and Improved Groups system
    Improved templating system
     
    We welcome ideas and suggestions for our next release and look forward to hear from you.
    DO NOT FORGET IT’S NOT FREE !!!
    ITS PRICELESS  =D.
Please follow the link below for RC 3 Download
http://sourceforge.net/projects/clipbucket/files/ClipBucket%20v2/clipbucket-2.7.0.4.v2929-rc3.zip/download

Thursday 2 October 2014

Pashto New Show Zarka Da Kashmir Yum